Dryer Vent Installation or Replacement Cost Range
Expect to pay between $145 and $480 for dryer vent installation. Most jobs include installing a waterproof exterior wall cap and flashing in vinyl or wood siding or in a roof and up to 15 feet of semi-rigid or rigid metal exhaust vent.
Average Cost
The average cost to install a new vent or replace a dryer vent duct is $305 for most jobs. Installing a vent in homes with brick or stone siding can cost much more due to the cost of cutting those materials.
In most cases an HVAC contractor or handyman will remove the old vent if it is beyond repair or cleaning won’t help. They’ll install a new vent duct along with the exterior grill and connect it to your dryer. Disposal of all old materials and cleanup is included.
Overview of Dryer Vent Installation
A dryer vent carries moisture out of your home that could otherwise cause mold. If the dryer uses gas, it also vents combustion gases including carbon monoxide. In short, a dryer vent is an essential piece of equipment and needs to be properly installed, maintained and cleaned seasonally for safety and to prevent the need for black mold removal later.
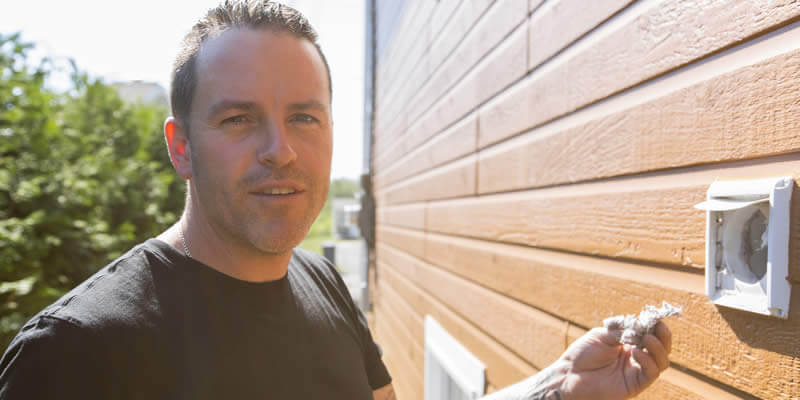
When the dryer is in a basement, the dryer vent typically runs through the rim joist that rests on top of the concrete foundation, the easiest installation option. On the first floor and above, or if your home is on a slab foundation, the vent flashing and cap are usually installed in the home’s sheathing, and the siding is installed around it.
Time and cost increase when the vent is installed after siding is in place. The more rigid the siding, the higher the cost. For example, it is relatively easy to install the exterior cap in vinyl siding or aluminum siding. The installation takes a little longer in wood siding or fiber cement siding and becomes quite difficult and costly in brick veneer or stone veneer siding.
This page of Costimates, or cost estimates, of outdoor and indoor home projects, covers cost factors like siding types and more. There’s a sampling of costs from other reliable estimating sites, retail prices for dryer venting supplies and costs submitted by homeowners like you.
Dryer Vent Installation Cost Factors
These factors affect what you’ll pay to have a dryer vent installed or replaced.
- Who Does the Work – Handy homeowners can do the work and save labor costs, which can amount to 80% of the total price. See the DIY section below. If you hire the work done, an experienced handyman will charge less than a mechanical HVAC contractor or plumber in most cases.
- Number of Cuts – Most installations require a single cut through a rim joist or home’s sheathing (plywood or OSB layer). However, in some first-floor installations, a hole is cut in the floor, the vent is run down and between floor joists, and a second cut is made in the rim joist to vent the duct. Making two cuts pushes costs toward the upper end of the spectrum.
- Vent Hose/Duct Type – Your options are cheap wire and plastic vents ($) which are not recommended, flexible metal foil and wire vents ($$) and rigid metal vents that must be cut to fit ($$$). See the Retail Costs section below for details on vent duct costs plus costs for the exterior flashing and cap.
- Siding Type – Covered above, when siding is a factor, the more difficult the siding is to cut, the higher the cost of the project.
- Where you Live – Like all costs, dryer vent cost rises or falls with the general cost of living. Prices are higher in large cities and coastal regions than in the Midwest or South, especially in rural areas. Cost of living can affect labor rates by 35% or more.
Retail Cost of Dryer Vent and Supplies
If you DIY, here are costs for the parts and tools you’ll need.
- $10 – $24 | Flexible Plastic/PVC Duct with clamps or other fitting types
- $22 – $40 | Flexible Galvanized Dryer Duct with clamps/fittings
- $24 – $46 | Aluminum Dryer Duct with clamps/fittings
- $32 – $55 | Stainless Steel Dryer Duct with clamps/fittings
- $15 – $85 | Exterior Dryer Vent Cover
- $16 – $30 | Homeowner-grade 4.25-inch Hole Saw
Dryer Vent Installation Cost Samples
Here are average costs for different installation types. The cost ranges reflect different prices for materials and the cost of living across the US.
In a replacement job, the old vent is removed and a new vent installed. No cuts are made.
In a new dryer vent installation, the hole for the vent is cut into the side of the home.
| Installation |
Replacement
|
New Dryer Vent |
|---|---|---|
| Basement Through Rim Joist | $145 – $175 | $180 – $250 |
| First Floor Through Vinyl or Aluminum Siding | $160 – $200 | $225 – $315 |
| First Floor Through Wood or Fiber Cement | $160 – $200 | $250 – $375 |
| First Floor Through Stone or Brick | $160 – $200 | $350 – $480 |
Permits, Inspection, Related Costs and Installation Time
Permits and Inspection Cost
- $0 | This home improvement project doesn’t require a permit.
Related Costs and Installation Time
Contractors and handyman services know what they need to make per hour to be profitable. Most work with an estimate of $45 to $100 per hour based on their overhead costs.
Installation takes just a few hours. Here are specifics:
- Less than 1 hour to 2 hours | Replacing a Worn Out Existing Dryer Vent and Duct
- 2-3 Hours| Installing a Dryer Vent in New Construction or Through Vinyl/Aluminum/Wood Siding
- 4-6 Hours | Installing a Dryer Vent in Brick and Stone Siding/Veneer
Pro Tip: Before replacing an old dryer vent, consider cleaning an existing dryer vent if the duct and vent are in good condition.
Related Projects
Are You an HVAC Pro or Dryer Vent Installer?
If so, head over to our Costimates Pro’s page, and help us make this page better and more accurate for both our visitors and your future customers.
DIY or Hire a Pro?
If you’re comfortable with moderately difficult indoor home projects and have a good range of tools, you can certainly handle this project. We’ve installed dryer vents several times, and the work is usually quite straightforward.
The one exception is that if you have to go through stone or brick siding or brick veneer, it is probably worth paying a little more to hire a handyman to do the job. Cutting into brick and stone is a pain and requires expensive diamond-tipped saw blades.
The most challenging part of installing a dryer vent is cutting the hole in the side of your home – and in the floor, if the installation requires that step.
The other steps are relatively easy.
Here are the basic steps.
- Determine the right location for the outside dryer vent cover.
- Drill a pilot hole in the center of where the vent cover will sit.
- Use a 4.25-inch hole saw, centered on the pilot hole, to cut the vent opening.
- If siding is already installed, use the pilot hole to guide you and cut from the outside in.
- Install the exterior vent hood and cover in the hole.
- Attach the dryer vent duct to the exterior vent, and use foil tape and/or clamps to secure it. Fasten the vent with screws (usually included). Caulk around the vent hood to prevent moisture and air drafts from entering your home.
- Attach the other end to the dryer’s exhaust port. Use clamps and/or foil tape on both ends to secure it even if the vent doesn’t have attached connectors.
This 3-minute video from the Home Depot does a good job covering installation steps, equipment, parts and supplies. It will help you decide if DIY dryer vent installation is something you want to tackle.
Reviewed and edited by Steve Hansen of Costimates
 Steve Hansen, that's me, the Senior Editor of Costimates. (Learn more about myself and our team) I'm an avid home improvement professional with more than 37 years experience working on all types of residential new home building, upfits, repairs and remodeling.
"Like most homeowners, I was frustrated with the lack of quality information available on specific home improvement repairs and renovations. In 2015, Costimates was formed to help homeowners learn as much as possible about various projects and their costs so they could make better financial decisions."